top of page
Search

Once the dream and preferences of a sofa gain shape in the imagination, it is time to sketch plans and double-check with the customer. In this case, the divan without a backside has to be no higher than 40cm. Legs matching another chair 12cm high. Width 180cm/Depth 90cm even though this can be short for longer people. In the end, it can be used for a longer person, thanks to the shape it.


As an Interior Designer, I use AutoCAD to sketch my plans and make sure the pieces will fit nicely together in the end. Each millimeter counts. When you take furniture apart and reassemble it, you know where the weak points in a piece of furniture are. Drawing and sketching are two different things. Better present both to the client.


It looks like a window above the divan in this sketch, but it actually shows you the divan from above, not including the inner frame. The decorative legs were cut with a band saw. The whole frame was cut on the miter saw and then the work started with the chisel while each wooden plank was clamped on a strong table. The round connection poles were cut in shape with a profile router. When you work with hand tools on the wood you feel the strength and weakness of the wood. In this case, we chose oak wood, to make sure the visible front plank will not bend and hold the persons sitting on it.


Creating something in your own space allows your children to watch and learn too. Luckily they never complain about the mess.


While the neighbors spread scents of barbecue we provide wood dust and color scents. The worst is the bone glue I agree.


After enjoying the sea view for hours comes the part where everything has to be clean. The upholstery process has begun. The mattress for this divan was made out of foams, Acryl, and velvet fabric.


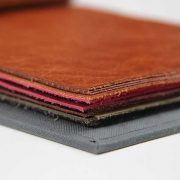
Velvet fabric demands special attention. You need to know in which direction the fibers go and make sure the piping does not cause the fabric to wrinkle.

But in the end, it is a rewarding feeling to see this quite luxurious divan in its full glory in the home of the client and hopes it corresponds to their vision and dream.


Stuck at home? Give it a try and play with your tools and materials!

  • Jun 13, 2020
  • 3 min read

Have you ever felt insecure sitting on a wobbly wooden chair? Some of us remember our parents scolding us for moving forwards and backwards while sitting on the chair at the dining table. Remember the pictures from the book 'Der Struwwelpeter/Die Geschichte vom Zappel-Philipp?


Struwwelpeter


It is important for a chair to stand balanced on the floor. When you want to protect your wooden floor and attach chair gliders underneath your four legged piece of furniture, make sure to double check on them and replace them once in a while. If the chair is not at the same leg height, it will not stand in balance and eventually it will start to be shaky with your weight on it. After some time your guest might enjoy waggling your chair and its joints will squeeze with despair. Broke leg covers may also scratch the floor.


Of course we enjoy to beautify our furniture once in a while. But when a chair is wobbly it needs to be dismantled into its pieces in order to fix the joints of the legs. If the interior wood of the joint is broken, the whole piece might have to be recreated.


Hence when we look at a chair, we need to check its condition and move it to its sides and not just look at the appearance. Sit on it, maybe the springs are not in place, the filling needs to be replaced, the fabric is torn or sticky? And when we take something apart, we have to remember how to put it back in place and what can be reused.


Broken chair joint

Here you can see the joint is broken and it will require many more hours to recreate the piece of wood matching the chair with a new wooden side to fit the design and joints.


Chipona chair repair

Another chair was about to fall apart. The nails, fabric, filling, springs and webbing were taken off, so that the wooden frame could be taken apart and the glue cleaned inside the joints. Glue does not stick on old glue. Therefore the wood needs to be cleaned with the necessary tools and only then glued together and held in position with clamps for a several hours.


Chisel and rasp

Some persons think that with a screw and their drill they can just hold a chair together. But a screw will not give the stability of a joint to the whole chair. Please don't choose the screw option, you destroy the wood and it will forever show. Use hand tools instead. Strip the glue with a chisel down and make it smooth with a wood rasp.


chair joint

The amazing thing with wood is, that you can give it a fresh new look by sanding its outer layers down and treat the woods with with Shellac, oil or paint.


Dark brown chair

This chair was painted so dark, it was hard to tell what kind of wood it was made of. After sanding the many layers down, it was possible to see the birch wood. Once the chair is cleaned of its color and glued together again the process of painting starts. Two layers of Shellac and then use a sanding paper all over it. Clean and continue with Shellac or paint. And sand the surface down softly before each new layer. Of course one has to take into consideration the drying time of the color types after each layer.


And then you grab your staples remover and take of all the fabric layers and staples, replace the filling and cover with new fabric, provided you do not have to replace the springs or the webbing.


Often I get a call to come and have look at a piece of furniture and give some advice. When it comes to leather I sometimes hear the sentence: "But they said, that it is real leather!"

Per se they might be right. But when it comes to leather, one has to distinguish different parts. What part of the leather hide (cow skin) is used after tanning, which is the technical name of the process when transforming the skin to a piece of leather one can use.


It is not my intention to teach all about leather, since I have not even been on such a factory. But as an Interior Designer I like to share knowledge about material and why I would use one over another.


To produce leather, animals are killed and skinned in a meat factory. Now the skin needs to be preserved. It is interesting to know, that the natural color of a leather hide is greyish and not brown. During the tanning process the cow skin is not only covered in salt, then cleaned of flesh and hair, cut, stripped, bathed in preserving chemicals and sanded, but also tinted before the drying process.


Now, when you decide to purchase leather furniture, you are well advised to try and look underneath the leather. Since you cannot always just open a zipper and look inside. I could feel an urge to look underneath. The latter might not work well in a store or if it is all covered with fabric against dust. So first ask for leather swatches of the same material. Have a good look at them and then ask whether this material has been used on all parts. Sometimes identical looking Vinyl material is used at the back, sides and "invisible" spots to save material and costs.


The confusing thing is, that some leather pieces come with a tag saying "Genuine Leather". It is real leather, but only the lower part of the split. When pulled stronlgy, it will fall apart and crumble like card board.

A hide of Full Grain Leather includes several layers and most importantly the top layer of the skin. You might also recognize an uneven pattern on it. Some people like a clean look and therefore the very top layer is sanded off for Top Grain Leather and it is slightly thinner and smoother than the Full Grain Leather. The worst on the other side is Bonded Leather. It is made out of leather, but only a compressed and glued version of the waste of the split. Imagine you use the leftovers in your juicer after making vegetable juice and glue it together saying it is a vegetable. There might be left only 17% of leather in Bonded Leather. As soon as you see fabric underneath the "leather" sample, it is leatherette. Leatherette is made from natural or synthetic material coated in PVC or polyurethane and contains no animal by-products. This material is easier to clean, but peels off after a few years just like your skin peels off after a skin burn in the sun.


Real leather breathes through its pores and therefore you do not sweat on it in a hot climate and keep warm in winter. With the years the skin gets softer. Full Grain and Top Grain Leather need maintenance to keep it from drying out. Please don't expose your piece of furniture to sun locating it close to large windows, otherwise the color will fade. Leatherette is not sun sensitive, but you sweat on it in a hot climate and it is colder in winter.

The process of transforming one piece of cow skin to a usable leather hide for further manifacture takes around two weeks in the industry. One hide is about 52 feet large. When making furniture around 30-45% of the cow hide are lost as waste material. The larger the surface to be covered with one piece, the more waste you get. Leather one does purchase by the piece, whereas fabric by the desired length on a roll at a standard width.

When in doubt, get your nose close to the leather and check it for its specific leather smell. PVC (Polyvinyl Chloride) and PU (Polyurethane) do not have such a wild note. Should your stomach manage, you can check out online videos on the tanning process of leather.


© 2021 Chipona Design, Proudly created with Wix.com

bottom of page